
Building an Async CSV Parser with Ampt
Build an asynchronous CSV parser by just writing app code and let Ampt handle provisioning and infrastructure configuration for you.
 Ben Miner

One thing that stands out with our users is how easy it is to integrate various services with Ampt. Connecting an AWS Lambda Function to S3 using Infrastructure as Code can be challenging, especially when ensuring least privileged permissions plus proper failover and retries. This guide walks you through building an asynchronous CSV parser by just writing application code and letting Ampt take care of provisioning and configuring the underlying infrastructure for you.
Getting Started
With our recently announced Ampt templates, it's faster than ever to start building an app on Ampt, complete with auto configured CI/CD. To launch your own version of the sample app that we are covering in this post, go to the template's GitHub repo and click on the "Deploy to Ampt" button.
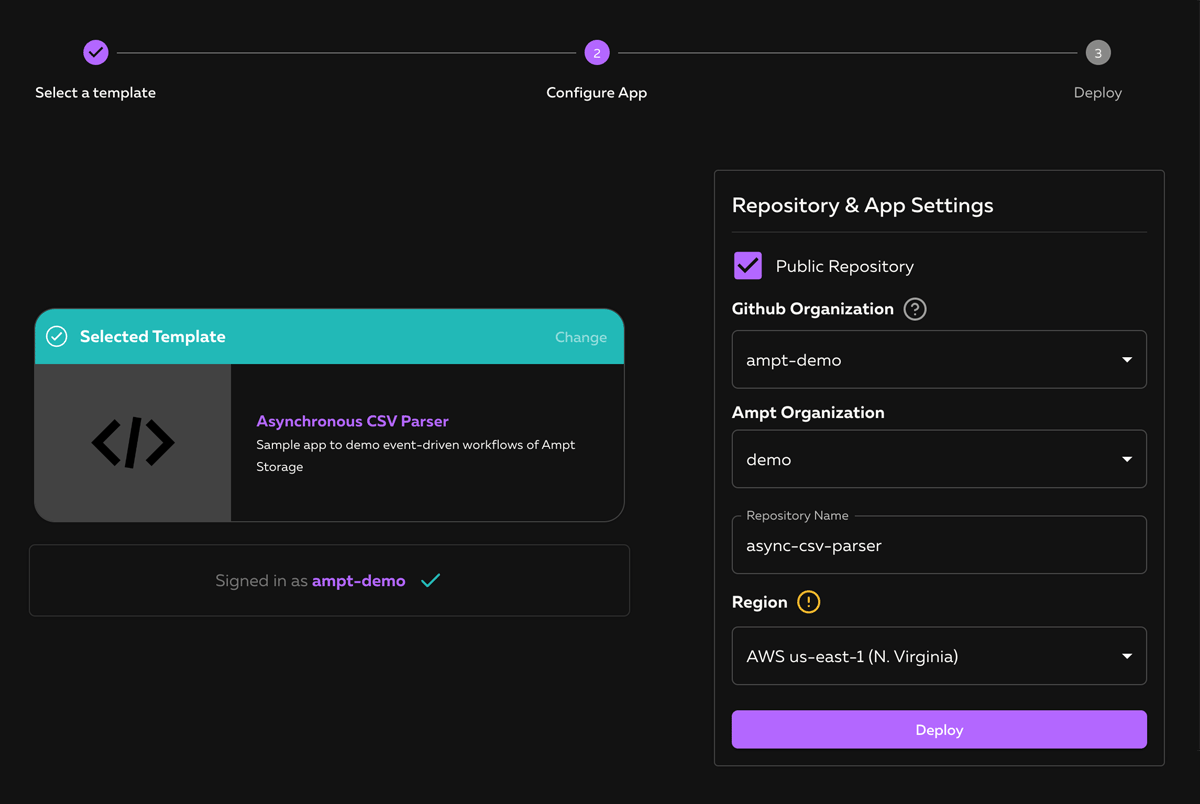
This will take you to a screen that lets you confirm your GitHub and Ampt app settings. If you're not signed into GitHub, click the "Sign in with GitHub" button to link your account to Ampt. Select your preferred GitHub organization and name your repository (it will default to "async-csv-parser"). Click the "Deploy" button and Ampt will create a new repository on your GitHub account, set up a new app in Ampt, configure CI/CD, and deploy your app to a live URL. All future commits to the main branch of this repository will trigger a deployment. We will come back to that later.
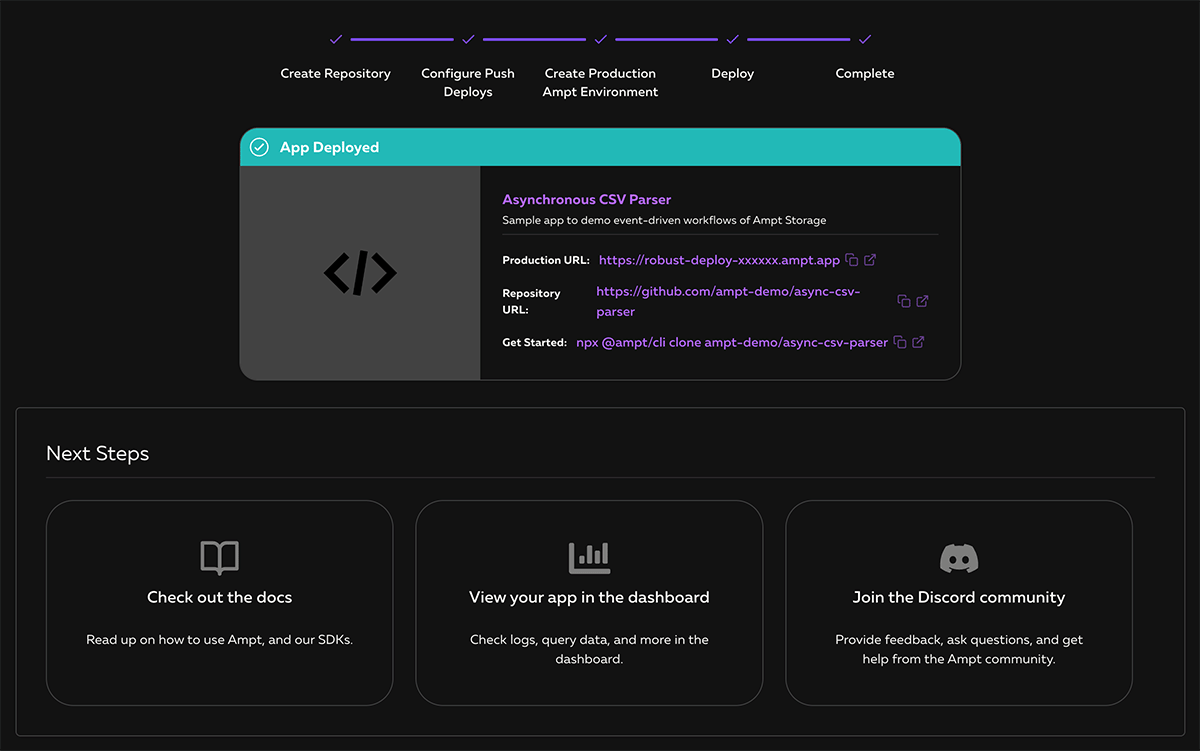
The screen below indicates that your Ampt app has been successfully set up and deployed. You can immediately start using the app by clicking on the Production URL or view the newly created repository in your GitHub account.
Now that our app has been created, we can begin customizing it. To begin working on the application, we can clone the new repository to our local machine. Running the new clone command will clone the code from your GitHub repo to your local environment, install any app dependencies, and connect to your isolated developer sandbox in just a few seconds. The CLI will switch to development mode, showing live logs and error messages in your terminal as you work. Code changes will sync immediately, providing near-instant feedback as you save changes. Plus, the Ampt Shell remains interactive, so you can keep entering commands while you develop.
terminalnpx @ampt/cli clone org-name/app-name
Simple Form to Upload Files
Let's start checking out the frontend of our application to upload files. The index.html file under the static folder has a simple form to allow users to upload files. Any files in the static folder will be publicly accessible at the root of your domain.
html<!DOCTYPE html> <html lang="en"> <head> <meta charset="UTF-8" /> <meta name="viewport" content="width=device-width, initial-scale=1.0" /> <title>File Upload</title> </head> <body> <form action="/api/csv" method="post" enctype="multipart/form-data"> Select file to upload: <input type="file" name="files" id="files" /> <input type="submit" value="Upload File" name="submit" /> </form> </body> </html>
The Upload Endpoint
Next, let's check the endpoint triggered when the "Submit" button is clicked. We'll need a post method to handle file uploads. With Ampt SDK's http interface, we can incorporate Node.js frameworks like Express.js or Koa. For this tutorial, we'll use Express.js. The code below shows the "/csv" endpoint that saves uploaded files using the Ampt SDK storage abstraction backed by AWS S3.
javascriptimport { http, storage } from '@ampt/sdk'; import express, { Router } from 'express'; import multer from 'multer'; const multipartFormLoader = multer({ storage: multer.memoryStorage(), }).any(); const app = express(); app.use(multipartFormLoader); const publicApi = Router(); const csvStorage = storage('csvs'); publicApi.post('/csv', async (req, res) => { try { const delimiter = ','; if (!req.files || !req.files.length) { return res.status(400).send('No files were uploaded.'); } const buffer = req.files[0].buffer; const filename = req.files[0].originalname; const writeResponse = await csvStorage.write(filename, buffer, { metadata: { delimiter }, }); return res.json(writeResponse); } catch (err) { res.status(500).send(err); } }); app.use('/api', publicApi); http.useNodeHandler(app);
Let's walk through the code. First, we need to initialize a Multer instance that will serve as our file-parsing middleware. This will allow our files to be easily read in all of our routes. You can read more about Multer here.
publicApi.post will create a POST endpoint available at the /csv route. Any posted files will be available in req.files including a buffer and the original name of the file uploaded. Keep in mind that to get these file names, we need to use multipart form requests. If you post the file as the body, it will not contain any other data.
To prevent a cluttered root directory, notice we've created an instance of Ampt Storage with the name "csvs" and assigned it to the variable csvStorage. This delegates all storage operations to the csvs directory, so any writes will save as csvs/$filename. storage().write() also lets you save custom metadata. In this case, we'll store the delimiter for future parsing.
Asynchronously Parsing the CSV
API calls come with processing time constraints. For an optimal user experience, it's essential to return responses quickly. Given that CSVs can be of varying sizes, trying to parse and save data during the API call might be slow and could lead to timeouts. Instead, we'll set up an event listener that triggers when new files are written to the "csvs" directory, specifically files ending with ".csv". To extract the rows and columns from these CSV files, we'll use the papaparse library. To make our processed data searchable, we'll save all records as items in our built-in database powered by Amazon DynamoDB.
Let's begin by importing the required packages:
javascriptimport { data } from '@ampt/data'; import Papa from 'papaparse';
Then we create a csvStorage.on() handler to listen for new file uploads so we can process the CSV files and save them to our database.
javascriptcsvStorage.on('write:*.csv', async (event) => { try { const { path } = event; const { metadata } = await csvStorage.stat(path); const delimiter = metadata.delimiter || ','; const buffer = await csvStorage.readBuffer(path); const csvString = buffer.toString('utf-8'); const csv = Papa.parse(csvString, { header: true, delimiter, }); if (csv.data.length) { await Promise.all( csv.data.map((row) => { const id = row['$distinct_id']; const firstName = row['$name']; const email = row['$email']; return data.set(`customer:${id}`, { id, firstName, email, }); }) ); } } catch (e) { console.error(e); } });
Diving into the code, notice the first argument of csvStorage.on(). Our goal is to only respond to new CSV files, so we specify the glob pattern write:*.csv. After a file is written to storage, we want its path and any relevant metadata, like custom delimiters. This is where csvStorage.stat() comes in by providing file info.
To process the CSV, we pull it into memory using csvStorage.readBuffer(), which fetches the file as a buffer. But Papaparse expects the CSV as a string, so we convert it using the .toString('utf-8') method. Papaparse's second argument is for configuration, so we'll indicate that a header exists and what the delimiter is.
Lastly, we verify if the CSV contains data. If it does, we process each row, transforming each value to camel case variables. For this tutorial, we're working with a basic customer spreadsheet having the CSV headers: "$distinct_id", "$name", and "$email". See a sample file that you can use for testing the app.
With the CSV content parsed, we can save it to our database using data.set. We use customer as the collection name and the customer's DISTINCT_ID for unique identification within this collection. A colon ":" is used to delineate collection names from their respective keys.
You can now visit the Ampt Dashboard, navigate to your app, click on the environment you're working in, and see the saved files under the "Storage" tab. The data records that were saved will show in the "Data" tab. Be sure to click "Get all items."
If you'd like to make changes, such as updating the parsed column names, you can commit your code to your main branch. This will trigger an automatic deployment to your production environment. If you're working with a team, you can create a PR against your main branch and a short-lived preview environment will automatically be created. Note that preview environments are not meant to be permanent and lack some customization that dedicated stage environments offer.
Wrapping Up
With Ampt, setting up an asynchronous workflow is a breeze. While we've kept it simple here, it's easy to expand by adding new endpoints for customer data retrieval or new handlers for different data types in storage. Start building now and be sure to join our Discord community.